In summary:
- Go beyond increasing font size; activate « Bold Text » to improve character definition and overall legibility.
- Use « Guided Access » to lock the iPad into a single app, preventing accidental taps from causing confusion.
- Aggressively declutter the Home Screen, removing all non-essential icons to reduce cognitive load.
- Disable automatic software updates to maintain a stable and predictable interface the user can rely on.
- Leverage built-in tools like FaceTime Screen Sharing for simple remote support before installing third-party apps.
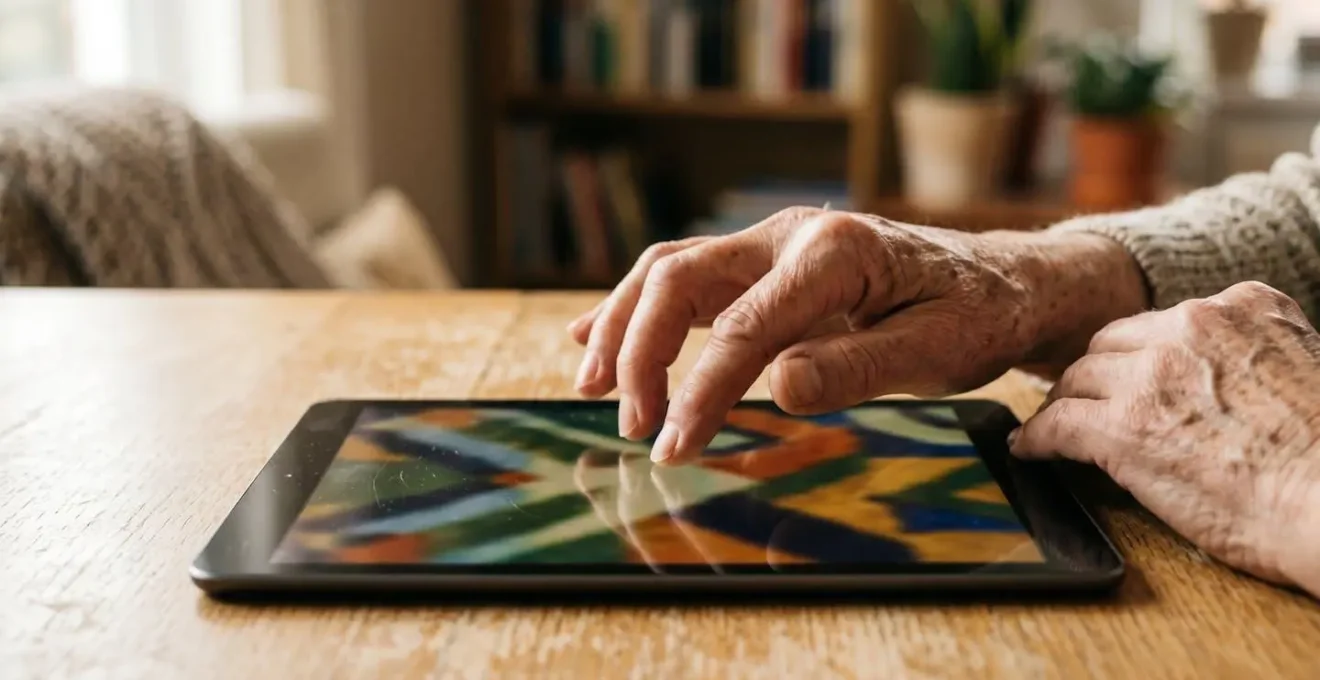
Setting up an iPad for an elderly parent or grandparent often starts with good intentions, usually focused on increasing the font size and installing a few familiar apps. But when the calls for help start coming— »I’m stuck on a screen, » « the app disappeared, » « everything looks different today »—it becomes clear that the real challenge isn’t just about visibility. It’s about the inherent complexity and « digital fragility » of a modern tablet. One accidental tap can lead a user down a rabbit hole of confusing menus, creating anxiety and a reluctance to use the device at all.
The common approach of simply adding apps or making text bigger fails to address this core problem. It treats the symptom (difficulty reading) without curing the disease (overwhelming cognitive load). But what if the key to a truly « senior-proof » iPad wasn’t about adding more, but about systematically taking away? The goal is to transform the device from a jack-of-all-trades into a master of one or two essential functions, creating a predictable, stable, and unbreakable digital environment.
This guide moves beyond superficial tweaks. We will explore the specialized accessibility settings and strategic configurations that fundamentally reduce complexity. By focusing on creating an « interface lockdown, » you can build a tool that empowers, rather than frustrates, its user, turning the iPad into a reliable window to family, news, and entertainment.
This article will provide a detailed roadmap, walking you through the crucial settings for readability, interface simplification, and remote support. The following sections break down each step to build a truly senior-friendly experience.
Summary: A Guide to Making an iPad Genuinely Senior-Friendly
- Why « Bold Text » matters more than just increasing font size for readability?
- How to use « Guided Access » to stop them accidentally closing the app?
- Big Launcher vs Standard Android: is a simplified interface worth the install?
- The mistake of leaving « Automatic Updates » on which changes the icons overnight
- How to install TeamViewer to fix their tablet without driving over?
- How to delete 90% of icons to leave only « Family » and « News »?
- Handheld electronic magnifier vs Phone App: best tool for reading menus?
- Amazon Echo vs Google Nest: Which voice assistant understands senior accents best?
Why « Bold Text » Matters More Than Just Increasing Font Size for Readability?
The first instinct when addressing readability issues for seniors is to find the « Font Size » slider and push it to the max. While this helps, it’s an incomplete solution. Excessively large fonts can be counterproductive, forcing lines of text to break in awkward places and requiring more scrolling, which disrupts reading flow. The often-overlooked secret to superior legibility lies in a different setting: Bold Text.
Activating Bold Text affects every letterform on the screen, increasing its stroke width. This enhances the contrast between the character and the background, making each letter more distinct and easier for aging eyes to process, especially for those with conditions like cataracts or macular degeneration. As Paul J. Nini, an expert in typography for older viewers, notes, fonts with consistent stroke widths are inherently more readable. Bolding text reinforces this consistency.
Sans serif faces appear to be the most readable, due to their larger x-heights and consistent stroke widths.
– Paul J. Nini, Typography and the Aging Eye
This isn’t just an aesthetic preference; it has a measurable impact. For individuals with low vision, character weight is often more critical than size. Scientific research backs this up, with studies showing that even moderate boldness can significantly improve reading speed. In fact, a 10% improvement in readability with Medium boldness has been demonstrated, a substantial gain that comes without the disruptive layout changes of oversized text. By combining a moderately larger font size with the Bold Text feature, you create a powerful, balanced solution that enhances clarity without compromising the user experience.
How to Use « Guided Access » to Stop Them Accidentally Closing the App?
One of the most common sources of frustration for a senior using an iPad is accidentally exiting an app. A misplaced finger on the edge of the screen or an unintended swipe can suddenly close FaceTime during a call with a grandchild, leaving the user confused and unable to get back. This is a perfect example of « digital fragility. » The solution is a powerful but hidden accessibility feature called Guided Access.
Guided Access transforms the versatile iPad into a single-purpose device. When activated, it locks the iPad into the currently open app, disabling all gestures and buttons that could lead the user astray. You can even disable specific areas of the screen within the app itself, such as complex settings menus or advertisement banners, further simplifying the experience. This « interface lockdown » is invaluable for creating a dedicated video-calling station, a simple photo album viewer, or a distraction-free news reader.
Setting it up is a one-time process. Once enabled in Settings, you can start a session in any app by triple-pressing the Top or Home button. A passcode, different from the main iPad passcode, is used to start and end the session, ensuring only you can exit the locked mode. This simple tool single-handedly eliminates the primary cause of user error and builds confidence by creating a completely predictable environment.
Here are the steps to enable it:
- Open the Settings app and navigate to Accessibility.
- Scroll down and tap on Guided Access, then turn the toggle on.
- Tap on Passcode Settings to set a unique passcode for the feature.
- Open the app you want to lock (e.g., FaceTime).
- Triple-press the Top button (or Home button) to start Guided Access. You can circle areas to disable.
- Tap Start. To end, triple-press the button again and enter your passcode.
Big Launcher vs Standard Android: Is a Simplified Interface Worth the Install?
While the title mentions Android-specific solutions like « Big Launcher, » the underlying principle is universally critical for senior-friendly tech: is a radically simplified interface worth it? The answer is a resounding yes. The standard iOS or Android home screen, with its grid of small icons, notification badges, and multiple pages, presents a high cognitive load for someone who is not a digital native. The key is to apply the philosophy of simplification to the iPad’s native environment.
The goal is to reduce the interface to its absolute essentials, a concept proven effective in dedicated devices designed for seniors. A hospital-based study evaluating the Ardoiz tablet, which features a simplified UI, found high usability and satisfaction rates among elderly patients. The study concluded that focused interfaces with larger on-screen items effectively reduce cognitive strain. With the Ardoiz tablet, researchers observed a System Usability Scale score of 74 out of 100 among patients with an average age of 85, demonstrating that simplification directly translates to better real-world use.
Although you cannot install a third-party « launcher » on an iPad as you can on Android, you can achieve a very similar result by aggressively curating the Home Screen. This involves removing almost every app from view, using folders sparingly, and leaving only a handful of large, clearly identifiable icons for core tasks. By stripping away the visual noise, you are not just tidying up; you are fundamentally lowering the mental energy required to operate the device. This transforms the iPad from a complex computer into a simple, approachable appliance for specific tasks like communication or entertainment.
The Mistake of Leaving « Automatic Updates » On Which Changes the Icons Overnight
For most tech users, automatic updates are a convenience, a background process that keeps devices secure and up-to-date. For a senior, however, an unexpected overnight update can be a disaster. They might wake up to find that the familiar green FaceTime icon has changed its design, the « Photos » app icon is a completely new shape, or a menu they used daily has moved. This disruption shatters the user’s mental model of the device.
This is not a minor inconvenience; it’s a significant source of stress and confusion that undermines the user’s confidence. Older adults often rely on routine and muscle memory to navigate technology. When an interface changes without warning, it invalidates that learned experience, forcing them to re-learn a process they had just mastered. As researchers on technology and aging note, this is a « taxing job for their working memory. » The constant relearning can lead to frustration and, ultimately, device abandonment.
The stability of the interface is paramount. A predictable environment where buttons and icons remain in the same place day after day is crucial for building long-term usability. Therefore, one of the most important « senior-proofing » steps is to disable automatic updates for both iOS and individual apps. You can find this setting under Settings > General > Software Update > Automatic Updates and turn them off. For apps, go to Settings > App Store and disable App Updates. This doesn’t mean the device will never be updated; it means *you* are in control. You can choose to perform updates manually during a visit, allowing you to walk the user through any significant changes in person.
How to Install TeamViewer to Fix Their Tablet Without Driving Over?
The moment a problem arises with the iPad, the question of remote support becomes critical. While third-party applications like TeamViewer QuickSupport offer powerful remote *control*, they come with their own complexities: the senior must find and download the app from the App Store, read a session ID over the phone, and grant permission. This can be a challenging process in itself. Before heading down that path, it’s essential to consider a simpler, built-in alternative: FaceTime Screen Sharing.
Available on iOS 15 and later, FaceTime Screen Sharing allows you to see the other person’s screen directly within a video call. You cannot control their screen, but you can see exactly what they see, enabling you to provide clear, verbal step-by-step guidance. For 90% of senior support issues—like finding a setting, navigating an app, or locating a photo—this « view only » access is all that’s needed. The senior is already familiar with FaceTime, and activating screen sharing is just one tap away during the call, dramatically lowering the barrier to getting help.
This approach empowers the senior to perform the actions themselves, which can be a valuable learning experience. Full remote control, as offered by TeamViewer, should be reserved for more complex technical fixes. The choice between these two tools depends entirely on the situation, but starting with the simplest, most familiar option is always the best strategy.
This comparison from a recent analysis highlights the key differences and helps you choose the right tool for the job. The source emphasizes that for basic setup and troubleshooting, the built-in screen sharing is often superior due to its simplicity.
| Feature | FaceTime Screen Sharing | TeamViewer QuickSupport |
|---|---|---|
| Installation Required | Built-in (iOS 15+) | Requires App Store download |
| Control Level | View only + verbal guidance | Full remote control capability |
| Setup Complexity | Simple (one tap during call) | Moderate (app install + permissions) |
| Security Considerations | Familiar FaceTime interface | Requires trust + session ID sharing |
| Best Use Case | Quick troubleshooting, settings adjustments | Complex fixes requiring direct control |
| Senior Familiarity | High (if already using FaceTime) | Low (new app to learn) |
How to Delete 90% of Icons to Leave Only « Family » and « News »?
A default iPad Home Screen is a minefield of distractions. It’s cluttered with dozens of apps the senior will never use—Stocks, Home, Reminders, Podcasts—each one a potential wrong tap waiting to happen. The single most impactful change you can make to reduce cognitive load is to ruthlessly declutter this screen, leaving only a handful of essential, clearly-labeled icons. The goal is to transform it from a command center into a simple menu.
With modern versions of iPadOS, you don’t need to permanently delete apps to achieve this. You can simply remove them from the Home Screen, which moves them into the « App Library » (accessible by swiping to the last page). This keeps the app on the device for occasional use but removes it from the user’s primary field of vision. This allows you to create a pristine, minimalist interface with just three or four large icons for core functions like FaceTime, Messages, Photos, and a news app.
You can even group related apps into a single, clearly named folder. For example, a « Talk to Family » folder could contain FaceTime, Messages, and Photos. The Dock at the bottom of the screen should also be simplified to hold only the absolute most critical applications. This act of « digital gardening » creates a calm, focused, and predictable environment where the user feels in complete control.
Action Plan: Achieving a Minimalist Home Screen
- Long-press any app icon until they all start wiggling.
- For each non-essential app, tap the minus (-) sign and choose « Remove from Home Screen ».
- Repeat until only 3-4 core apps remain visible.
- Create one folder for related apps (e.g., « Family ») by dragging one app on top of another and renaming the folder.
- Customize the Dock by dragging only the most crucial apps (max 4) into it.
Handheld Electronic Magnifier vs Phone App: Best Tool for Reading Menus?
For seniors with significant vision challenges, reading small print on menus, medication bottles, or mail is a daily struggle. While handheld physical or electronic magnifiers have been the traditional solution, the iPad itself contains a far more versatile and powerful tool: the built-in Magnifier app. This feature turns the iPad’s camera into a sophisticated, real-time digital magnifier that outshines its physical counterparts.
Unlike a simple magnifying glass, the Magnifier app offers a suite of dynamic features. Users can easily zoom in and out with a slider, but more importantly, they can tap a button to « freeze frame » the image. This allows them to capture a stable picture of a wobbly menu or a small label and then zoom and pan around the static image at their leisure. Furthermore, the app includes adjustable color filters to dramatically increase contrast (e.g., yellow text on a black background), an invaluable aid for specific vision conditions. It even has a flashlight control to illuminate poorly lit text.
Case Study: The Superiority of Tablet-Based Magnification
According to a 2025 analysis of senior iPad usage, the device’s large screen and integrated software provide a comprehensive solution that surpasses single-purpose physical magnifiers. The study highlights that the iPad’s ability to make text as large as needed, combined with advanced features like freeze-frame capture, adjustable color filters for enhanced contrast, and an integrated flashlight, offers unparalleled versatility for everyday tasks. For reading anything from medication bottles to restaurant menus, the iPad becomes a multifunctional tool that adapts to the user’s specific vision needs in a way a physical device cannot.
To make this feature easily accessible, you can add a shortcut to the Control Center. This allows the senior to launch the Magnifier anytime with a simple swipe and a tap, turning the iPad into an indispensable aid for daily life. It’s a perfect example of how an integrated software solution can be more powerful and convenient than a dedicated physical gadget.
Key Takeaways
- Predictability is paramount: Disabling automatic updates prevents confusing interface changes that erode user confidence.
- Simplicity is strength: Aggressively removing unused icons from the Home Screen drastically reduces cognitive load.
- Integrated tools are best: Use built-in features like Guided Access, FaceTime Screen Sharing, and the Magnifier app before adding third-party complexity.
Amazon Echo vs Google Nest: Which Voice Assistant Understands Senior Accents Best?
When considering voice assistants for seniors, the conversation often turns to standalone smart speakers like the Amazon Echo or Google Nest. However, for an iPad user, the most powerful and contextually aware voice assistant is the one already built-in: Siri. While Echo and Nest are excellent for ambient home tasks like playing music or setting timers, they cannot control the iPad itself. Siri, on the other hand, is deeply integrated into the operating system and can directly manage device functions and accessibility settings.
For a senior, this integration is a game-changer. They can use simple, natural language commands to perform tasks that would otherwise require navigating through multiple menus. This hands-free control is not just a convenience; it’s a powerful accessibility layer. A user can say « Hey Siri, increase brightness, » « Hey Siri, open FaceTime, » or « Hey Siri, call my daughter » without ever touching the screen. For users with motor difficulties or those who find touch interfaces challenging, Siri becomes the primary method of interaction.
Siri also provides crucial visual feedback on the iPad’s screen, confirming that it has understood the command. This is a significant advantage over voice-only smart speakers, which can leave a user unsure if their request was processed correctly. Furthermore, with the « Type to Siri » accessibility option, even seniors with speech or hearing challenges can interact with the assistant. The following table illustrates why Siri is often the superior choice for on-device assistance.
| Capability | Siri on iPad | Amazon Echo / Google Nest |
|---|---|---|
| Device Control | Can control iPad settings, brightness, open apps, adjust accessibility features | Cannot control iPad or tablet devices |
| Visual Feedback | Shows visual confirmation on screen for every command | Voice-only response (no visual confirmation) |
| Type to Siri Option | Available for seniors with hearing/speech challenges | Not available (voice-only interaction) |
| Personal Communication | Initiates FaceTime calls, reads messages, sends texts | Can make voice calls but limited messaging integration |
| Best Use for Seniors | Primary device interaction, personal communication, accessibility control | Ambient home tasks: music, timers, weather, smart home control |
By shifting the focus from adding features to strategically removing complexity, you can transform a standard iPad into an invaluable, stress-free tool. The true measure of success is not how many things the device can do, but how easily and reliably it performs the few things that matter most. Start today by implementing these focused adjustments to create a digital experience that connects and empowers your loved one.